Create Your First Agent
In this chapter, we'll walk through the process of creating your very first AI agent using the Foundry Agent Service.
By the end, you'll have a simple agent running locally that you can interact with in real time.
First switch back to the Github codespace environment you created earlier. Make sure the terminal pane is still opened on the workshop folder.
Login to Azure
Before you can use the Foundry Agent Service, you need to sign in to your Azure subscription.
Run the following command and follow the on-screen instructions. Use credentials that have access to your Microsoft Foundry resource:
az login --use-device-codeCreate a .env File
We'll store secrets (such as your project endpoint) in an environment file for security and flexibility.
Create a file named
.envin the root of your project directory.Add the following lines to the file:
envPROJECT_ENDPOINT="https://<your-foundry-resource>.services.ai.azure.com/api/projects/<your-project-name>" MODEL_DEPLOYMENT_NAME="gpt-4o"
Replace https://<your-foundry-resource>.services.ai.azure.com/api/projects/<your-project-name> with the actual values from your Microsoft Foundry project.
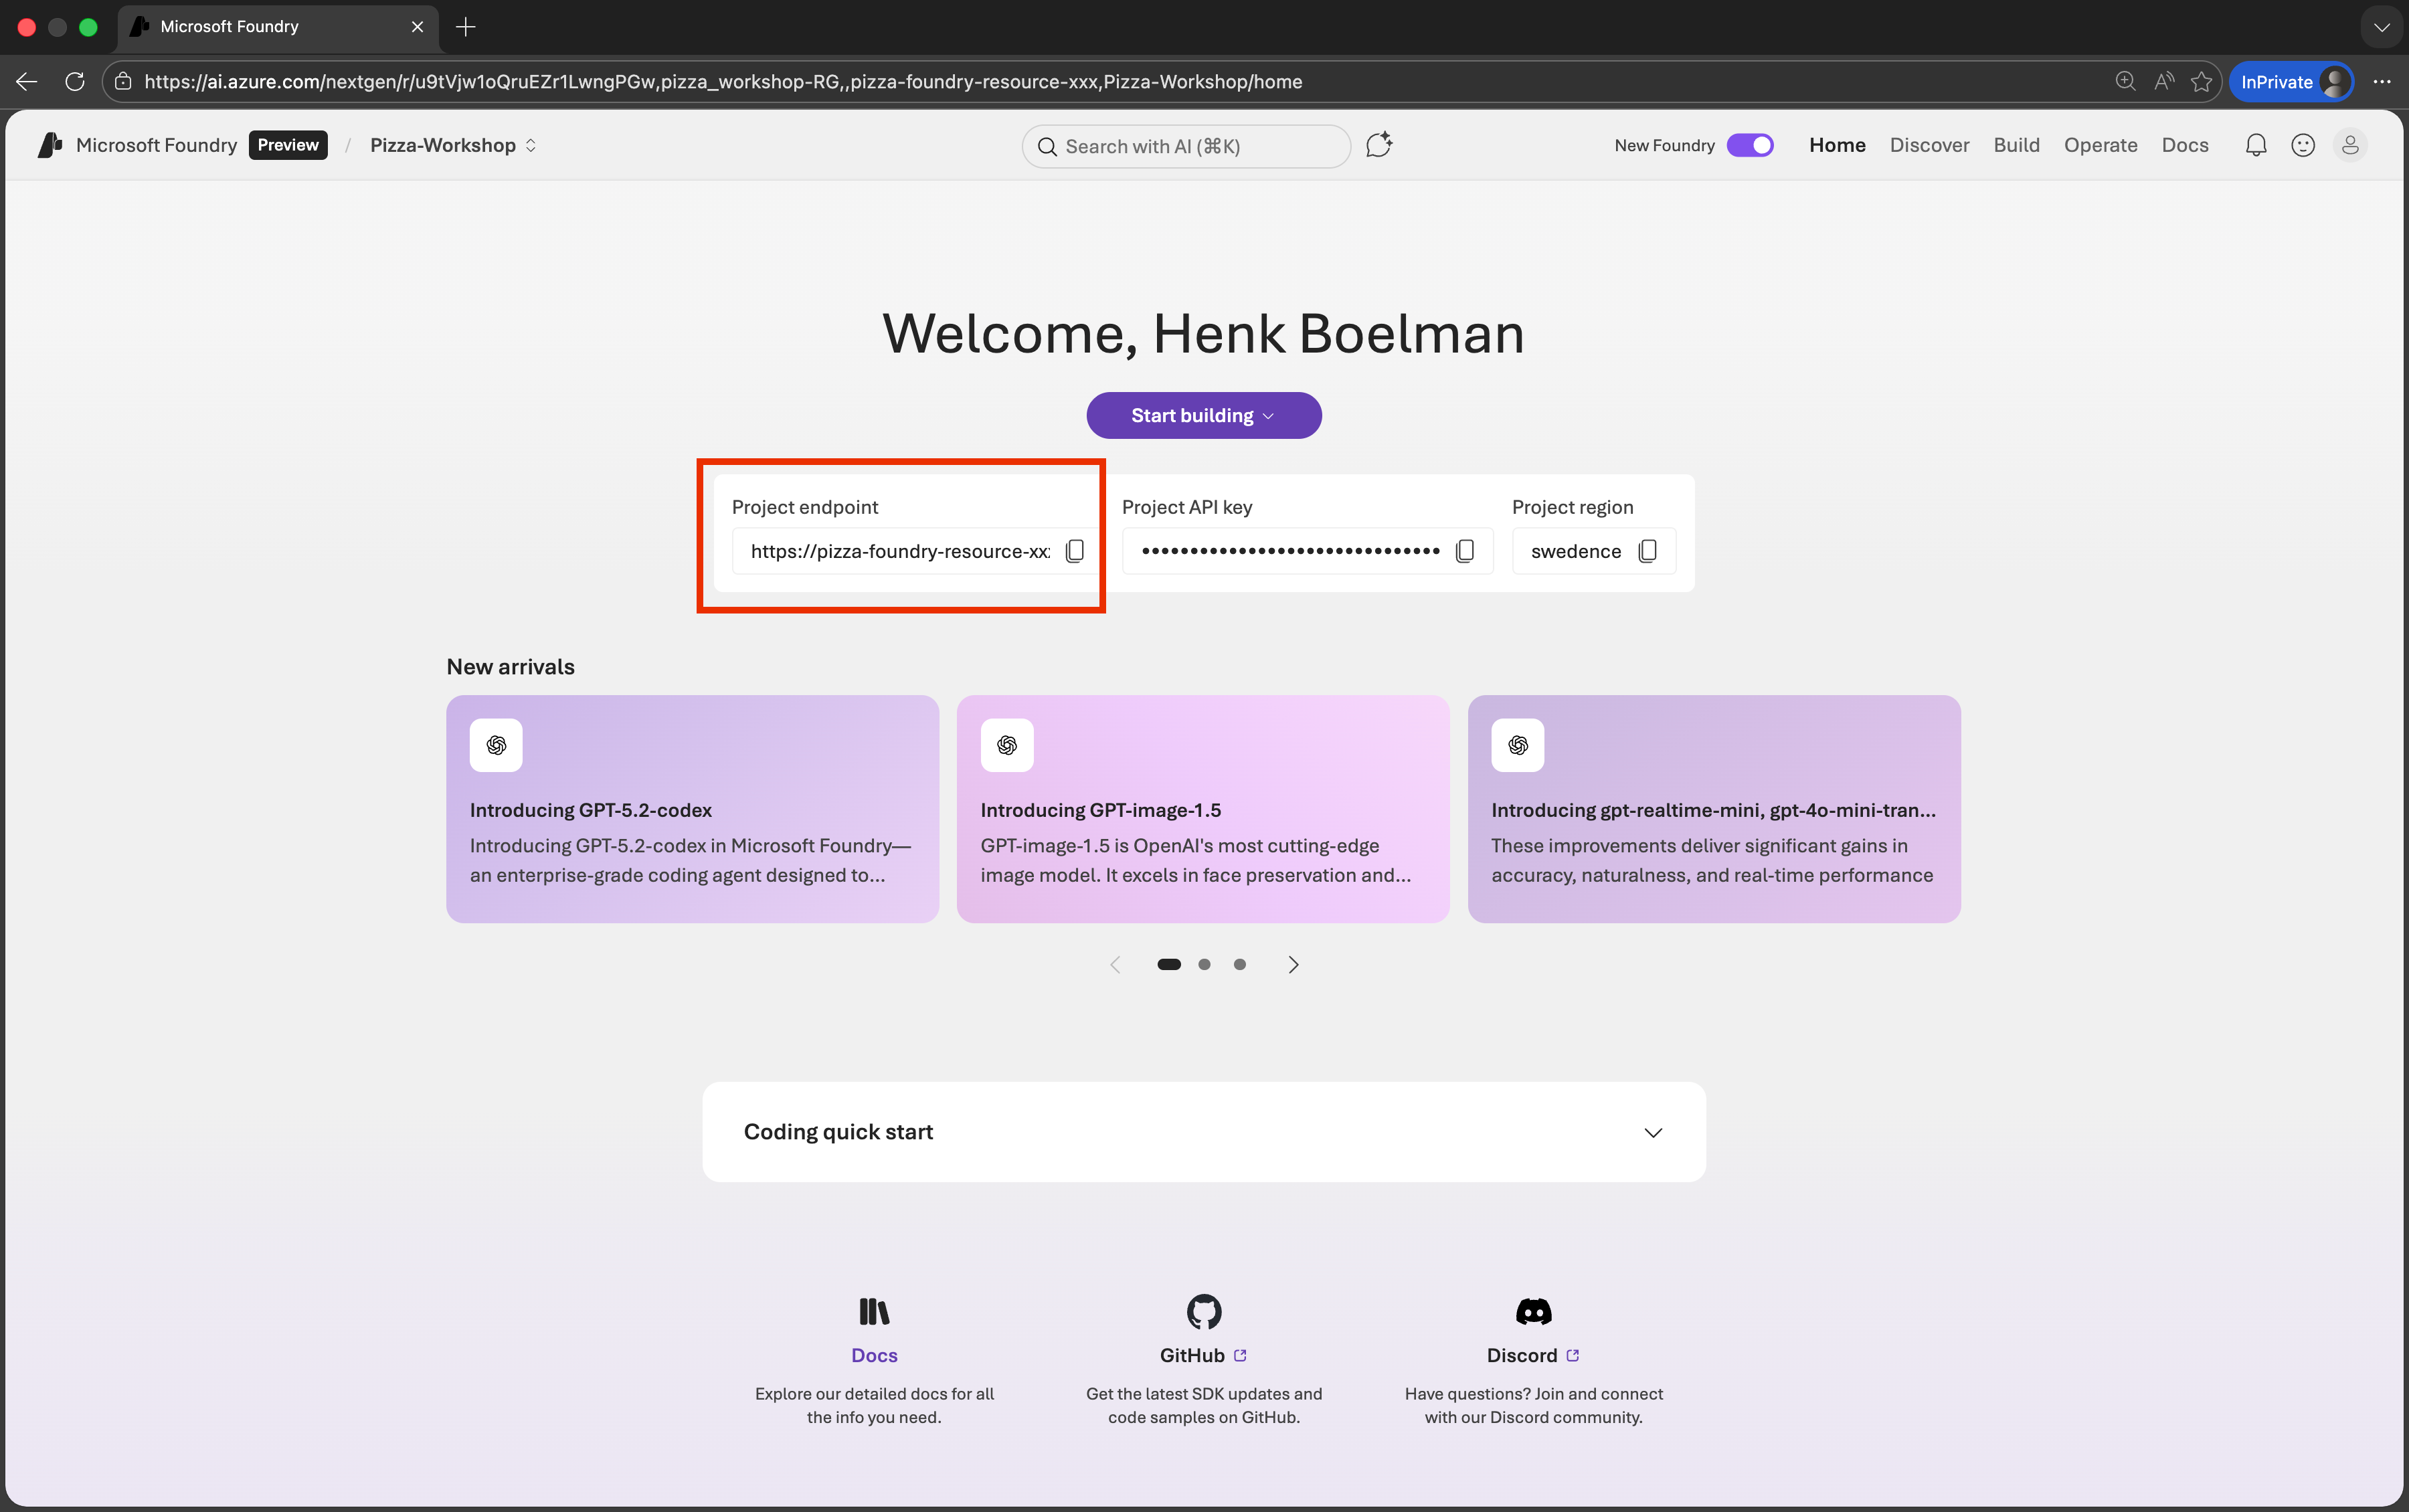
Where to find your endpoint:
- Go to the Microsoft Foundry portal
- Navigate to your project
- Click on Overview
- The endpoint will be displayed on the homepage of your project
📝 Notes
- Make sure there are no spaces around the
=sign in the.envfile.
Create a Basic Agent
We'll now create a basic Python script that defines and runs an agent.
- Start by creating a new file called:
agent.pyin the workshop folder
Add Imports to agent.py
These imports bring in the Azure SDK, environment handling, and helper classes:
import os
from dotenv import load_dotenv
from azure.identity import DefaultAzureCredential
from azure.ai.projects import AIProjectClient
from azure.ai.projects.models import PromptAgentDefinition
Load the .env File
Load environment variables into your script by adding this line to agent.py:
load_dotenv()Create the Project Client
This client connects your script to the Microsoft Foundry service using the endpoint and your Azure credentials.
project_client = AIProjectClient(
    endpoint=os.environ["PROJECT_ENDPOINT"],
    credential=DefaultAzureCredential(),
)
openai_client = project_client.get_openai_client()
Create the Agent
Now, let's create the agent itself. We'll use create_version to create a Foundry Agent with a PromptAgentDefinition.
agent = project_client.agents.create_version(
    agent_name="hello-world-agent",
    definition=PromptAgentDefinition(
        model=os.environ["MODEL_DEPLOYMENT_NAME"],
    ),
)
print(f"Agent created (id: {agent.id}, name: {agent.name}, version: {agent.version})")
Create a Conversation
Agents interact within conversations. A conversation is like a container that stores all messages exchanged between the user and the agent.
conversation = openai_client.conversations.create()
print(f"Created conversation (id: {conversation.id})")
Chat with the Agent
This loop lets you send messages to the agent. Type into the terminal, and the message will be sent to the agent.
while True:
    # Get the user input
    user_input = input("You: ")

    if user_input.lower() in ["exit", "quit"]:
        print("Exiting the chat.")
        break

    # Get the agent response
    response = openai_client.responses.create(
        conversation=conversation.id,
        input=user_input,
        extra_body={"agent": {"name": agent.name, "type": "agent_reference"}},
    )

    # Print the agent response
    print(f"Assistant: {response.output_text}")
Run the Agent
Finally, run the Python script:
python agent.pyYou can now chat with your agent directly in the terminal. Type exit or quit to stop the conversation.
Debugging
If you get an error (the principal *****-****-***-****-*****) does not have permission to create assistants in your Microsoft Foundry project. Specifically, it's missing the Microsoft.CognitiveServices/accounts/AIServices/agents/write data action.
Here's how to fix it:
Go to the Azure Portal: https://portal.azure.com
Navigate to your Microsoft Foundry resource:
- You can find it by searching for the name of your Foundry resource (e.g.,
my-foundry-name).
- You can find it by searching for the name of your Foundry resource (e.g.,
Open the "Access Control (IAM)" panel:
- In the left-hand menu of the resource, click Access Control (IAM).
Click "Add role assignment":
- Choose Add → Add role assignment
- Select a role that includes the required data action:
- Recommended: Cognitive Services Contributor or a custom role that includes
Microsoft.CognitiveServices/accounts/AIServices/agents/write
- Recommended: Cognitive Services Contributor or a custom role that includes
Assign the role to your principal:
- Use the Object ID or name of the principal:
******-****-***-******** - This might be a service principal, user, or managed identity depending on your setup.
- Use the Object ID or name of the principal:
Save and confirm:
- Once assigned, wait a few minutes for the permission to propagate.
- Retry the operation to create the assistant.
Recap
In this chapter, you have:
- Logged in to Azure
- Retrieved a project endpoint
- Separated secrets from code using
.env - Created a basic agent with the Foundry Agent Service
- Started a conversation with the agent
Final code sample
import os
from dotenv import load_dotenv
from azure.identity import DefaultAzureCredential
from azure.ai.projects import AIProjectClient
from azure.ai.projects.models import PromptAgentDefinition

load_dotenv()

## Configure Project Client
project_client = AIProjectClient(
    endpoint=os.environ["PROJECT_ENDPOINT"],
    credential=DefaultAzureCredential(),
)
openai_client = project_client.get_openai_client()


## Create a Foundry Agent
agent = project_client.agents.create_version(
    agent_name="hello-world-agent",
    definition=PromptAgentDefinition(
        model=os.environ["MODEL_DEPLOYMENT_NAME"],
    ),
)
print(f"Agent created (id: {agent.id}, name: {agent.name}, version: {agent.version})")


## Create a conversation for the agent interaction
conversation = openai_client.conversations.create()
print(f"Created conversation (id: {conversation.id})")

## Chat with the agent

while True:
    # Get the user input
    user_input = input("You: ")

    if user_input.lower() in ["exit", "quit"]:
        print("Exiting the chat.")
        break

    # Get the agent response
    response = openai_client.responses.create(
        conversation=conversation.id,
        input=user_input,
        extra_body={"agent": {"name": agent.name, "type": "agent_reference"}},
    )

    # Print the agent response
    print(f"Assistant: {response.output_text}")